In today’s fast-paced digital world, a sluggish computer can be a major source of frustration. Whether you use your computer for work, entertainment, or both, a slow system can hinder productivity and dampen your overall experience. Fortunately, there are several effective strategies you can implement to enhance your computer’s speed and performance. In this article, we present you with 10 valuable tips that will help you breathe new life into your machine and enjoy a faster, smoother computing experience.
Declutter and Organize
Start by cleaning up your desktop and removing unnecessary files, icons, and shortcuts. Organize your files into well-structured folders to prevent clutter and improve navigation.
Decluttering and organizing your Windows 10 computer can lead to a more efficient and pleasant computing experience. By streamlining your files, desktop, and settings, you can enhance productivity and reduce unnecessary distractions. Here’s a step-by-step guide to help you declutter and organize your Windows 10 system:
- Clean Up Your Desktop:
- Remove Unused Icons: Delete shortcuts and icons for programs and files you no longer need.
- Group Icons: Organize remaining icons into folders or categories for a cleaner look.
- Set a Wallpaper: Choose a calming or inspiring wallpaper that isn’t visually overwhelming.
- Organize Files and Folders:
- Sort and Categorize: Create folders to organize your documents, pictures, music, and videos. Sort files into relevant folders.
- Rename Files: Give files meaningful names for easier identification.
- Delete Unnecessary Files: Delete duplicate, outdated, or irrelevant files to free up disk space.
- Manage Start Menu:
- Pin Favorite Apps: Pin frequently used apps to the Start Menu for quick access.
- Remove Unwanted Tiles: Unpin or resize tiles that you don’t use regularly.
- Uninstall Unused Programs:
- Go to Settings > Apps > Apps & features.
- Uninstall programs you no longer need or use.
- Clean Up Disk Space:
- Use the built-in Disk Cleanup tool: Search for “Disk Cleanup” in the Start Menu, select your main drive (usually C:), and follow the prompts to remove temporary files and system files.
- Manage Notifications:
- Go to Settings > System > Notifications & actions.
- Customize which app notifications you want to receive.
- Organize Taskbar:
- Pin Essential Apps: Pin frequently used apps to the taskbar for quick access.
- Unpin Unnecessary Apps: Right-click on taskbar icons and select “Unpin from taskbar” for apps you don’t use often.
- Manage Files in Downloads and Documents:
- Regularly clean out your Downloads and Documents folders. Move important files to organized folders, and delete unnecessary files.
- Manage Browser Bookmarks:
- Delete outdated or irrelevant bookmarks.
- Organize bookmarks into folders for easy access.
- Review and Customize Settings:
- Go through system settings to personalize your computer, such as display, sounds, power settings, and more.
- Adjust privacy settings to your comfort level.
- Regular Maintenance:
- Schedule regular maintenance tasks like disk cleanup and disk defragmentation.
- Backup Important Data:
- Regularly back up your important files and data to an external drive or cloud storage.
Uninstall Unused Programs
Over time, your computer accumulates programs you may no longer need. Uninstalling unused software frees up valuable disk space and can lead to a noticeable improvement in speed.
Uninstalling unused programs on Windows 10 is a straightforward process that can help free up valuable disk space and improve your computer’s performance. Here’s how to do it:
- Open the Start Menu: Click on the “Start” button located in the bottom-left corner of your screen. This will open the Start Menu.
- Access Settings: Click on the “Settings” gear icon in the left-hand side of the Start Menu. Alternatively, you can press the “Windows” key + “I” on your keyboard to open the Settings directly.
- Navigate to Apps: In the Settings window, click on the “Apps” option. This will take you to the Apps & features section.
- View Installed Apps: On the left sidebar, select “Apps & features.” You’ll now see a list of all the apps and programs installed on your computer.
- Select the Program to Uninstall: Scroll through the list of installed programs to find the one you want to uninstall. Click on the program to select it.
- Uninstall the Program: After selecting the program, a “Uninstall” button will appear. Click on this button to initiate the uninstallation process.
- Follow Uninstallation Prompts: A confirmation prompt will appear, asking if you’re sure you want to uninstall the program. Review the prompt and click “Uninstall” again to confirm.
- Complete the Uninstallation: Follow the on-screen prompts to complete the uninstallation process. This may involve confirming additional actions or settings, depending on the program.
- Repeat for Additional Programs: To uninstall more programs, repeat steps 5 to 8 for each program you want to remove.
- Restart Your Computer: After uninstalling the programs, it’s a good practice to restart your computer. This helps ensure that any changes are fully implemented.
Remember that some programs may require administrator permissions to uninstall. If prompted, provide the necessary permissions or enter your administrator password.
Additionally, if you’re looking to remove built-in Windows apps that you don’t use, you can follow these steps:
- Open PowerShell as an administrator. You can do this by searching for “PowerShell” in the Start Menu, right-clicking on “Windows PowerShell,” and selecting “Run as administrator.”
- In the PowerShell window, type the command to uninstall the specific app. For example, to uninstall the Get Help app, you would type:
Get-AppxPackage *gethelp* | Remove-AppxPackage - Press Enter to execute the command. The app will be uninstalled.
Please exercise caution when uninstalling programs, especially if you’re unsure about their functionality. Make sure you’re only uninstalling programs you no longer need or use.
Regular Disk Cleanup
Perform regular disk cleanup to remove temporary files, cache, and other clutter that can accumulate and slow down your system. Use built-in tools like Disk Cleanup (Windows) or Disk Utility (macOS) for this purpose.
Disk Cleanup is a built-in utility in Windows 10 that allows you to free up space on your computer by removing unnecessary files. Here’s how to use Disk Cleanup:
- Open Disk Cleanup:
- Press the “Windows” key on your keyboard to open the Start Menu.
- Type “Disk Cleanup” in the search bar.
- Click on the “Disk Cleanup” app from the search results.
- Select a Drive:
- The Disk Cleanup tool will prompt you to select a drive to clean up. Choose the drive you want to clean (usually the C: drive, which is your main system drive).
- Scan for Files:
- Disk Cleanup will analyze your selected drive to determine which files can be safely removed.
- This may take a few moments, as the tool calculates the amount of space that can be recovered.
- Choose File Types to Delete:
- Once the scan is complete, a list of file categories will appear.
- Check the boxes next to the types of files you want to delete. Categories may include Temporary files, Downloads, Recycle Bin, Thumbnails, and more.
- View More Options (Optional):
- If you want to clean up system files (which may require administrator permissions), click the “Clean up system files” button.
- You can then select additional categories, such as Windows Update Cleanup, Previous Windows installations, and more.
- Start Cleanup:
- After selecting the desired file categories, click the “OK” button. Disk Cleanup will ask you to confirm the deletion of the selected files.
- Confirm Deletion:
- Click the “Delete Files” button to confirm that you want to remove the selected files.
- Wait for Cleanup:
- Disk Cleanup will begin removing the selected files. This process may take some time, depending on the amount of data being deleted.
- Completion:
- Once the cleanup process is complete, you’ll see a summary of the space you’ve recovered.
- Close Disk Cleanup:
- Click the “OK” button to close the Disk Cleanup window.
By regularly using Disk Cleanup, you can effectively remove temporary and unnecessary files, freeing up disk space and potentially improving your computer’s performance. Keep in mind that some files, such as system files or downloaded program files, may not be safe to delete. Always review the file categories before confirming the cleanup to ensure you’re not removing important data.
Upgrade Your RAM
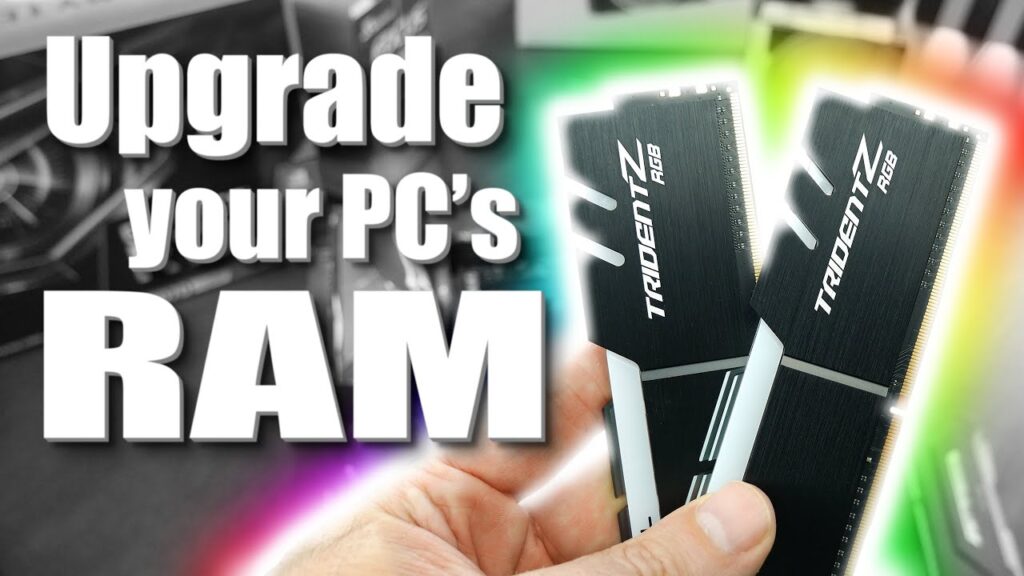
If your computer feels sluggish, consider upgrading your RAM (Random Access Memory). More RAM allows your computer to handle multiple tasks simultaneously, resulting in a faster and smoother performance.
Upgrading your RAM (Random Access Memory) can significantly enhance your computer’s performance and multitasking capabilities. RAM is a vital component that allows your computer to access and manipulate data quickly, which in turn can lead to smoother and more efficient operations. If your computer is experiencing sluggishness, upgrading your RAM can provide a noticeable boost. Here’s how to upgrade your RAM:
- Check Compatibility:
- Before purchasing new RAM modules, ensure they are compatible with your computer. Check your computer’s specifications, motherboard model, and RAM type (DDR3, DDR4, etc.).
- Determine RAM Capacity and Speed:
- Decide how much RAM you need based on your computing requirements. For everyday tasks, 8GB to 16GB of RAM is usually sufficient. If you’re a power user or into resource-intensive tasks like video editing or gaming, consider 32GB or more.
- Determine the RAM speed (measured in MHz) supported by your motherboard. Opt for RAM modules that match or are supported by your motherboard’s speed.
- Purchase the RAM:
- Purchase the appropriate RAM modules from a reputable retailer or online store. Make sure to buy from a trusted source to ensure you’re getting genuine products.
- Prepare Your Workspace:
- Turn off your computer and unplug all cables. Place your computer on a clean, flat surface with adequate lighting.
- Open Your Computer Case:
- Depending on your computer’s design, you’ll need to remove the side panel or access door to reach the motherboard. Consult your computer’s manual or search online for specific instructions for your model.
- Locate the RAM Slots:
- Identify the RAM slots on your motherboard. These slots are usually long and located near the CPU. Most motherboards have two or more slots.
- Install the New RAM:
- Gently press down on the tabs on either side of the RAM slot to release any existing RAM modules (if present).
- Align the notch on the RAM module with the notch on the slot and firmly press down until the module clicks into place.
- If you’re installing multiple modules, make sure to install them in the correct order and follow your motherboard’s manual for dual-channel or quad-channel configurations.
- Close the Computer Case:
- Put the computer case side panel or access door back on and secure it with screws.
- Power On and Test:
- Plug in all cables and peripherals, then power on your computer.
- Check your computer’s system properties to confirm that the new RAM is recognized and installed correctly.
Upgrading your RAM can provide a significant performance boost, especially if your computer previously had limited memory. Remember that RAM upgrades won’t improve tasks that aren’t limited by RAM, such as slow internet speeds or outdated hardware. For comprehensive performance improvements, ensure your RAM upgrade complements other hardware and software optimizations.
Use Solid-State Drives (SSDs)
Upgrading to an SSD from a traditional hard drive can significantly improve your computer’s speed. SSDs offer faster data access and reduced boot times.
Solid-State Drives (SSDs) have revolutionized computer storage with their speed, durability, and efficiency. Unlike traditional Hard Disk Drives (HDDs), which use spinning disks to store data, SSDs utilize flash memory chips to store and retrieve information. This technology has brought about a significant improvement in overall system performance and user experience.
Manage Startup Programs
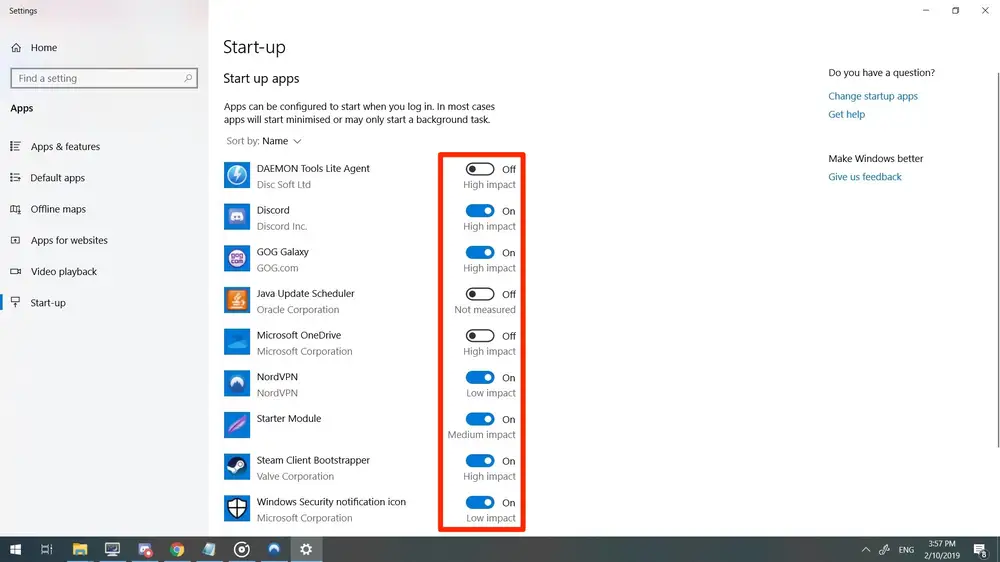
Disable unnecessary startup programs that launch when your computer boots up. This helps reduce the time it takes for your computer to become fully operational.
Managing startup programs in Windows 10 allows you to control which applications launch automatically when your computer boots up. By controlling these startup items, you can potentially improve your computer’s boot time and overall performance. Here’s how to manage startup programs in Windows 10:
- Open Task Manager:
- Press the “Ctrl + Shift + Esc” keys on your keyboard simultaneously. This will open the Task Manager.
- Alternatively, you can right-click on the taskbar and select “Task Manager” from the context menu.
- Navigate to the Startup Tab:
- In the Task Manager window, click on the “Startup” tab. This tab displays a list of all programs that are set to start when your computer boots up.
- Disable Startup Programs:
- To disable a startup program, right-click on the program you want to disable and select “Disable.”
- Note that some programs may have a status of “Enabled” or “Disabled,” while others may have a “High” or “Low” impact on startup. You can consider the impact when deciding which programs to disable.
- Enable Startup Programs:
- If you want to enable a previously disabled program, simply right-click on the program and select “Enable.”
- Search Online (Optional):
- You can right-click on a startup program and select “Search online” to find more information about the program and determine whether you should keep it enabled or disable it.
- Exit Task Manager:
- After you’ve made your changes, you can close the Task Manager window.
- Restart Your Computer:
- For the changes to take effect, you need to restart your computer.
- Use the Settings App (Alternative Method):
- You can also manage startup programs using the Settings app:
- Open the Start Menu and click on “Settings” (gear icon).
- Go to “Apps” > “Startup.”
- Here, you’ll see a list of startup programs. Toggle the switch to enable or disable each program.
- You can also manage startup programs using the Settings app:
- Third-Party Startup Managers (Advanced):
- If you prefer more advanced control over startup programs, you can also consider using third-party startup manager tools that provide additional features and insights.
Update Operating System and Drivers
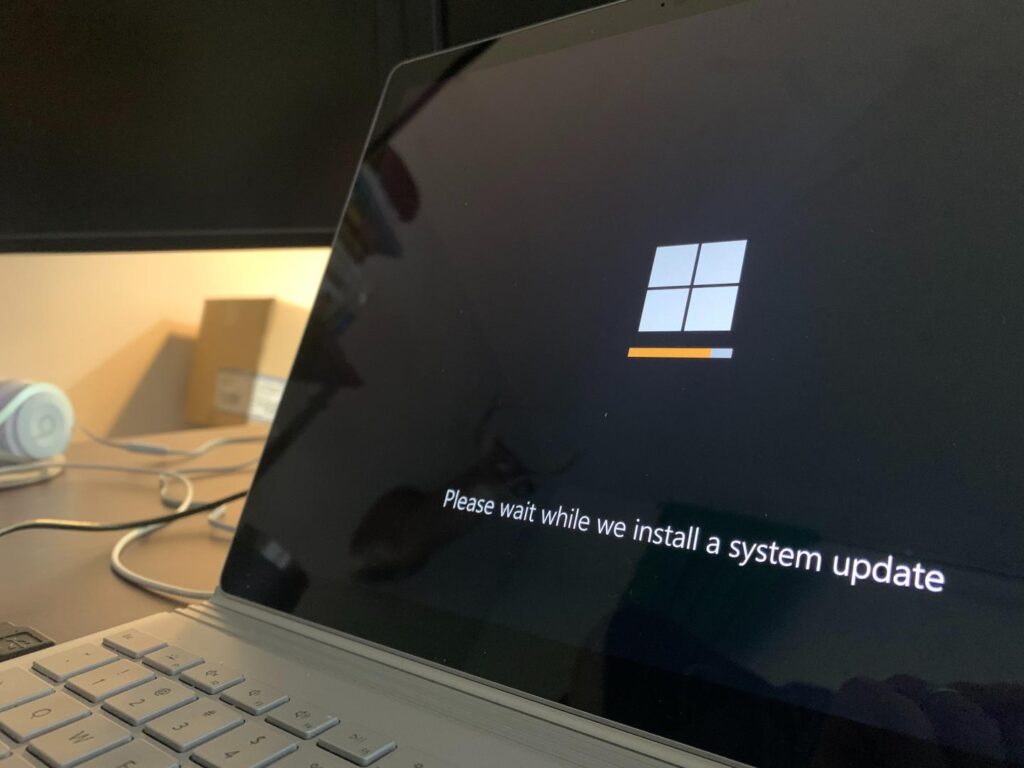
Keeping your operating system and drivers up to date ensures that your computer is running efficiently and benefiting from the latest performance enhancements.
Updating your operating system and drivers is a crucial aspect of maintaining the security, stability, and performance of your computer. Both operating system updates and driver updates provide important improvements, bug fixes, and compatibility enhancements. Here’s how to update your operating system and drivers effectively:
Updating the Operating System (e.g., Windows 10):
- Check for Updates:
- On Windows 10, click the “Start” button, then go to “Settings” (gear icon) > “Update & Security.”
- Click on “Windows Update” in the left sidebar.
- Click the “Check for updates” button. Windows will search for available updates.
- Install Updates:
- If updates are found, click “Download” and “Install.” Your computer will restart as necessary.
- Enable Automatic Updates (Recommended):
- You can set Windows to automatically install updates by clicking “Change active hours” to specify when you use your computer the most. Windows will then try to install updates during inactive hours.
Updating Drivers:
- Identify Outdated Drivers:
- It’s important to know which drivers need updating. You can do this manually by identifying devices in Device Manager with yellow exclamation marks.
- Download Drivers from Manufacturer’s Website:
- Visit the website of your computer’s manufacturer or the individual hardware components (e.g., graphics card, sound card) to download the latest drivers.
- Use Windows Update (For Some Drivers):
- Windows Update can also provide driver updates for some hardware components. After running Windows Update, check the “Optional updates” section.
- Driver Update Utilities (Optional):
- There are third-party tools available that can help scan and update drivers automatically. However, exercise caution when using these tools and download them only from reputable sources.
- Install Drivers:
- Run the downloaded driver installer and follow the on-screen instructions.
- Some drivers may require you to restart your computer to complete the installation.
- Keep Graphics Drivers Up to Date (for Gamers and Graphics Designers):
- For users who engage in gaming or graphics-intensive tasks, keeping your graphics drivers up to date is especially important. Visit the website of your graphics card manufacturer (NVIDIA, AMD, Intel) for the latest drivers.
Install a Lightweight Antivirus
Some antivirus programs can consume a lot of system resources. Opt for a lightweight antivirus solution that provides robust protection without slowing down your computer.
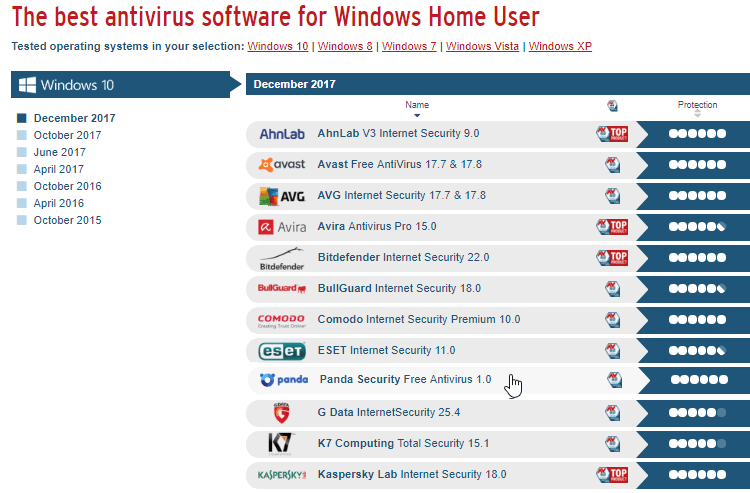
Selecting a lightweight antivirus solution is crucial for maintaining system performance while ensuring robust protection against malware and cyber threats. Here are some of the best lightweight antivirus options that offer excellent security without slowing down your computer:
- Bitdefender Antivirus Free Edition:
- Bitdefender is renowned for its top-notch security features.
- The free version offers real-time protection against viruses, phishing, and malware.
- It has a minimal impact on system resources, making it an ideal choice for users seeking lightweight protection.
- Kaspersky Security Cloud Free:
- Kaspersky offers reliable malware detection and protection.
- The cloud-based approach ensures real-time updates without heavy impact on your system’s performance.
- It includes features like anti-phishing, anti-ransomware, and web protection.
- Avira Free Security Suite:
- Avira provides a range of security features, including antivirus, anti-malware, and real-time protection.
- The free version offers strong protection while remaining light on system resources.
- It includes a VPN, password manager, and system optimization tools.
- Sophos Home Free:
- Sophos offers advanced malware detection and removal.
- The lightweight client is designed to protect your system without causing slowdowns.
- It includes remote management features, making it suitable for families and multiple devices.
- Windows Defender (Microsoft Security Essentials):
- Windows Defender comes pre-installed on Windows 10 systems.
- It provides baseline protection against viruses and malware.
- While not the most feature-rich, it’s lightweight and integrates seamlessly with the Windows operating system.
- Panda Free Antivirus:
- Panda offers real-time protection against viruses and malware.
- Its cloud-based scanning reduces the need for resource-intensive local scans.
- It includes a USB vaccine to prevent malware from spreading through USB devices.
- ESET NOD32 Antivirus:
- ESET is known for its fast and efficient malware detection.
- It has a small system footprint and doesn’t slow down your computer during scans.
- The advanced settings allow for customization while maintaining a lightweight profile.
- Adaware Antivirus Free:
- Adaware provides real-time protection against malware and cyber threats.
- It features a gaming mode to reduce interruptions while playing games.
- The free version offers basic protection with minimal impact on system resources.
Browser Optimization
Clear your browser’s cache regularly, disable unnecessary extensions, and consider using a lightweight browser for faster web browsing.
Here are some tips for optimizing your web browser:
1. Keep Your Browser Updated:
- Regularly update your browser to the latest version to ensure you have access to the latest features, security patches, and performance improvements.
2. Clear Browser Cache and Cookies:
- Over time, cached files and cookies can accumulate, slowing down your browser. Periodically clear your browsing data to free up space and improve performance.
3. Disable or Remove Unnecessary Extensions:
- Extensions can add functionality to your browser, but having too many can slow it down. Disable or remove extensions you no longer use.
4. Optimize Startup and Home Page:
- Set your browser to open with a single tab or a blank page to reduce initial loading time. Disable unnecessary startup items.
Regular Maintenance and Cleaning
Physically clean your computer’s hardware, including the keyboard, monitor, and cooling fans, to prevent overheating and maintain optimal performance.
Conclusion
A slow computer doesn’t have to be a permanent headache. By implementing these 10 tips, you can rejuvenate your machine and enjoy a faster, more efficient computing experience. From decluttering and optimizing your software to upgrading hardware components and practicing routine maintenance, each step contributes to a smoother operation and enhanced productivity. Take control of your computer’s performance, and embrace a faster and more enjoyable digital journey.
